Frequently Asked Questions
How to Track Participation at an Event for K-State 360
There are three ways you can track participation:
- Card Reader
- GPS
- Department Reporting
How to Checkout Card Readers
Fill out this form.
To manually get to the form, follow the instructions below:
- Go to OrgCentral and login with your eID.
- Search “Resources for Student Organizations”
- Choose “Forms”
- Then choose “Card Reader, Chromebook, & Tablet Request Form”
- Fill out the form (You can utilize your own laptop instead of checking out a Chromebook as long as you have a USB port on your computer. You will need one laptop per card swipe).
- Once the form is complete you should hear back from our staff to verify that the card readers are available for your event.
What if I Don't Have a Portal on OrgCentral?
- If you do not have a portal on OrgCentral and this is a onetime event, then your event can be added to the K-State 360 portal for tracking participation.
- If you do not have a portal on OrgCentral, but you will be hosting multiple events throughout the school year then our team can create a portal for your group. Just contact kstate360@k-state.edu.
How to Create an Event in Your Portal
- Login to OrgCentral and go to your portal. (You will need admin access to your portal to be able to create events).
- Select “Events”.
- Click on “Create an Event” in the upper right-hand corner.
- Enter the required information and then click “Create Event”.
How to Track Participation with Card Readers in OrgCentral
- Login to OrgCentral and go to your portal.
- Be sure you have admin access to your portal to track participation. If you do not, contact your portal admin and request access.
- Select “Events”.
- Choose the event that you would like to track participation for.
- On the right-hand side you should see a gray rectangular box with multiple options. Choose “Participation”.
- Click “Turn On Card Swipe” when you are ready to start swiping.
- When you are finished swiping choose "I'm Done Swiping" to turn off card swipe.
- If a student does not have their card you can choose “Add Participants” and search for them in the system (make sure you have chosen “Full Community” at the top).
- Once you have found their name click it and it will add their name to the Selected list. Then hit "Save" and they will be added to your list.
- We suggest also having a spreadsheet open for students to type their information if they did not bring their ID. This can sometimes be more simple then searching them in OrgCentral.
How to Track Participation With Card Readers When You Do NOT Have Internet
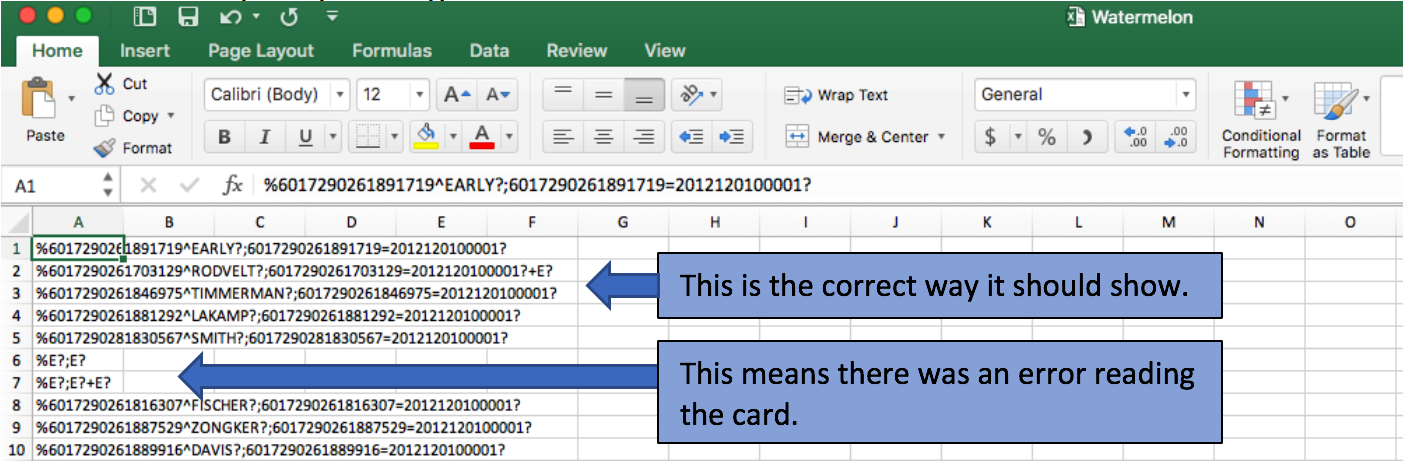
- Open up a spreadsheet (Excel or Google both work).
- Connect your card reader to your computer.
- Click on an empty cell and swipe the ID.
- It will show up with a long set of numbers. If there are only a few numbers then the card was not read correctly. When you are done swiping and have internet, you will need to upload the list to OrgCentral or you can send it to our team and we will upload it for you. If you would like to upload to OrgCentral follow the instructions below:
- Go to your event listed in your portal
- Click on "Participation"
- Choose "Upload Data" and select your spreadsheet. It will then translate it into names.
How to Export Participation Data
When you are finished swiping IDs in OrgCentral you can export the data to share with our team and your team.
- Go to your portal.
- Click on “Events”
- Choose the event you would like to export the participation list for.
- On the right-hand side select “Participation”.
- At the bottom of the gray box click “Export Participation” and it will add an excel file to your downloads.
- This Excel file can then be sent to our team to upload to K-State 360.
How to Give Someone Access to Your Portal
- Login to OrgCentral and go to your portal.
- Click on “People”
- Choose “Invite People”. If the person you want to give access is already on your people list then skip to step 5.
- Type their email (the @k-state.edu email address) and make sure to choose “Administrator” under the “Invitee Group”. The person now has administrative access once they accept your invitation. You can skip the rest of the steps.
- If the person is already on your people list then click on their name and chose “Manage” on their profile page.
- Under “Manage” select “Administrators” to give them access to manage details in your portal.
